Home Cooking
Wednesdays were designated as my cooking and baking day but I've recently been incapacitated by having to do 5 days a week for the next couple of months. I thought that would be goodbye to my recipe posts for a while but my need to cook amplified and I ended up developing a little routine to make things work.
The key issue here is lighting. It might seem obvious to cook at night instead of on my RDO, since that's what most people do. However, because I like to blog everything, the ability to take good photos is crucial. Night time is terrible for photos but I figured I could produce the food at night, after work and get up early in the morning to take the snaps. It's been working out fairly well.
I was looking for non-cheesecake ways to use cream cheese when I found this recipe for cream cheese pound cake. I baked this cake last night, under the unplanned supervision of my housemate, Stain, who happened to be making dinner at the same time. The great thing about pound cake is that it's supposed to be made at least 1 day before eating anyway so I left the whole thing until this morning and had a slice for breakfast. The original recipe is for 2 loaves so I halved it for 1 regular-sized loaf. Below are my quantities for 1 loaf.
Cream Cheese Pound Cake
1 loaf
Ingredients:
- 170g butter, at room temperature
- 1/2 bar (125g) cream cheese, at room temperature
- 1 and 1/2 cups sugar
- 3 large eggs
- 1/2 tsp vanilla extract
- 1 and 1/2 cups all purpose flour
- 1 tsp salt
1. Preheat the oven to 175 degrees Celsius. Grease and line the loaf tin.
2. With a stand mixer, beat the butter and cream cheese until smooth.
3. Add the sugar and beat until light and fluffly (about 5 minutes).
4. Add the eggs, one at a time, beating well after each addition. Mix in the vanilla extract.
5. Reduce the speed on the mixer and add the flour and salt in 2 batches until just combined.
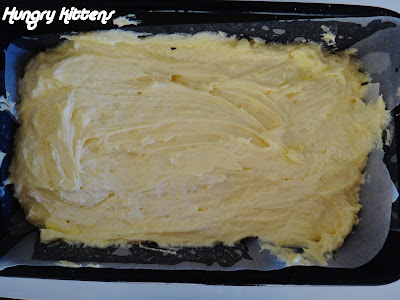
6. Scrape the batter into the prepared loaf tin and smooth the top. The pan will seem full. Tap the pan on the table to eliminate large air bubbles.
7. Bake until golden and an inserted toothpick comes out almost clean. This should take about 60-75 minutes (it took me 60 minutes exactly). If the top begins to brown too quickly, cover the tin with some foil.
8. Let the cake cool in the tin for 10 minutes before turning it out to cool completely (top sides up).
9. Rest the cake and serve it the next day.
Stain watched me add all the ingredients to the stand mixer. As you can see from the recipe, it's literally just a matter of adding things in and occasionally adjusting the speed. The recipe couldn't be any easier to follow. I also received feedback about the batter; Stain ate a substantial amount (after being warned not to) and claimed it was yum... but then he felt queasy afterwards.
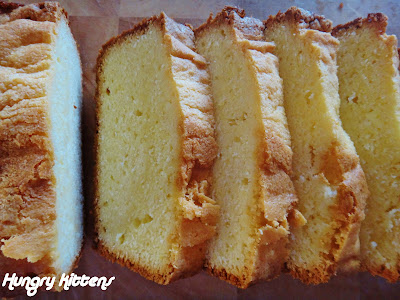
This pound cake works even though there are no raising agents inside. I checked the recipe twice to make sure. The resultant cake is very dense, moist and rich. Each slice FEELS heavy. It's also very sweet. If I were to remake this, I would probably reduce the amount of sugar.
Texture close-up
The texture is beautifully buttery and soft and you can appreciate that the most when trying a slice on its own. I found it too rich to eat an entire slice like that, but fresh strawberries and unsweetened Greek yoghurt did a great job of cutting through the richness.
The cake can be wrapped in foil and kept at room temperature for up to 3 days or wrapped and frozen for up to 3 months. Simply slice first and reheat slices as you need them via microwave in 10 second bursts until they defrost.


No comments:
Post a Comment